non-candy Easter Basket Ideas for young kids

We don’t need help picking out candy for Easter Baskets – walk into any store and you’ll find multiple isles of options.

Coming up with creative (clutter – free!) options to fill up that Easter Basket is a little more challenging.

Here are a few of my favorites for the small humans in your house!

non candy easter basket

Most of these are interchangeable by age group…and I bet you can find quite a few in the Bullseye’s Playground Section (dollar section) at Target!

He is Risen!
blog sign

4 Tips when Flying with Infants & Toddlers

On our most recent family trip, Robert & I were chatting about our daughter’s adventures and guestimated our two-year-old has taken about two dozen flights in her life, and her first flight was at only six weeks old (I flew solo with her!). This is what happens when grandma & grandpa live 2,000 miles away 😉

Besides healthy lifestyle related topics, “Do you have any tips for flying with my little?” is definitely the number one question I get as a mama.

Time to blog & share🤗 I hope you can learn from our experience!

download (1)

The way I see it, there are roughly 3 different stages of flying…and flights are different during those different stages:
I. Infant
II. Mobile Baby
III. Active Toddler

Here are my 4 Top Tips within each of those stages. Be sure to check out the Random Insight for All Ages at the bottom!


I. INFANT: 

This stage is from newborn to right before they begin to crawl

4. Just Say NO
We know your sweet baby is absolutely ADORABLE. This doesn’t mean you need to let people touch them at a germ-y airport and give “oooohs” & “ahhhhs” right in their face. I found that when I wore her in a baby carrier while walking through the airport (this is my fav for 5 months & younger), people didn’t get as close, because it also meant they were getting close to me.

3. Pack extra clothes
…for you, too! You’re a mom. Of course there’s an extra set of clothes for baby in the diaper bag. But because you’ll be holding baby the entire time, you might not want to stay in a shirt full of spit up (or worse, a blowout), so pack yourself an extra shirt, too.

2. Don’t be afraid to ask the flight attendants for support
This one especially holds true if you’re flying solo. You won’t have an extra arm the entire flight, so if you need an extra glass of water (especially if nursing), help reaching an item from the overhead bin so you don’t have to get up with babe, or ANYTHING…ring that call button. I have a friend who had a really positive experience of a flight attendant heating up baby’s stored milk.

1. Feed on the way up & way down
IMG_7840
The sucking motion will help their little ears.
{If you’re breastfeeding and have never Nursed In Public before, I want to give you the biggest virtual fist bump and tell you you can do it! Find a cute nursing cover and go for it. BONUS: People leave you & your baby alone when you have a cover on (see #4 above) or are nursing your baby in general. Just like in the photo to the left, I kept my cover over her the entire flight, even when she wasn’t eating. No one else could see her, but I still had eyes on her.}


II. MOBILE BABY: 

This stage is from when baby learns to crawl until maybe 15/18ish months. Of the 3 stages we’ve been through, IMP this one is the most challenging because they want to be on the GO, but will probably be sitting on your lap and don’t quite have a long enough attention span to stay focused on one thing for more than a few minutes. Creativity is big here. Hang in there, Mama! You’ve got this.

4. Pip Squigz!
These pip squigz were an awesome distraction/toy, especially if you have a window seat. They suction to the windows/walls/tray tables, etc. On one flight, my daughter spent quite a bit of time moving an empty cup back and forth between them.

3. All the snacks, all the time
Snacks make me happy, too. Need I say more?
(This is probably what they’ll spend most of the flight doing, so have extras)

2. Bring Something New
Bring your child’s favorite toy, of course… but be sure to grab fun textured toys they haven’t seen before (or at least in a while). Remember to bring their lovey, favorite bear, or blanket or anything else to encourage snuggling since they’ll likely be on your lap.

1. Again, feed on the way up and way down
…the sucking motion helps their little ears. (If nursing/bottles aren’t an option, encourage pacifier/sippy cup)


III. BUSY TODDLER: 

This stage is about the 18ish month mark and older. Kids can fly on your lap until they are 2-years-old, at that time they need their own seat.

4. All the snacks, all the time
…you’ll be glad you packed extra.

3. Travel Potty Seat
If your child is potty trained/ing, this travel potty seat is a lifesaver in public places. The legs fold out so it can sit across a bench, or fold down for you to use an absorbing bag in the middle. Finally, they fold under and inside a very thick, portable bag and can slip inside your diaper bag without “germing up” everything else inside.  (We use it when we’re out & about running errands, too)

2. Download their favorite show ahead of time
IMG_6010With Amazon Prime/Netflix, etc you can download episodes to a device that will stay there for 48 hours. We grabbed a kids’ pair of headphones from Target, downloaded 3-4 episodes of Daniel Tiger to my old phone, and called it a day. We aren’t big on much screen time at home, but our philosophy is that traveling is a special time for special treats…which makes her love watching shows even more. This tip should really be a tie for #1.


1. Get their jaws moving on the way up & way down

sippy cup, snacks, pacifier…whatever! It’ll help their ears with ascending & descending.

IV. RANDOM INSIGHT FOR ALL AGES
In a (mostly) chronological order

Schedule Flight during Naptime
I don’t have much to say on this because Nora has always put herself to sleep (vs. falling asleep in our arms) so she rarely sleeps on planes anyway. BUT! Many moms have told me this has been a life saver for them. You know your kiddo best!

Choosing to travel with a Stroller vs Carrier
IMG_6006This is a tough one! I (almost) say both!
…like in this photo- HA!

The Stroller is really helpful to have during your time in the airport. It’s a place for baby to be so you don’t have to hold him/her the whole time…and they have a place to sit when you need to use the bathroom (assuming you’re traveling solo). Having a stroller at your destination might be nice, too. Remember you can check this at the gate for free. The younger they were, the more helpful I found the stroller. By about 2, they won’t want to sit in it anymore anyway.
The Carrier is also helpful to have because it’s way less bulk than a stroller, baby thinks you’re holding him/her, but you still have your hands free. I’ve liked having the carrier at ALL stages….both very new infant to wild toddler. This is my favorite carrier from newborn to 5ish months….and this is my favorite carrier from 5ish months to toddlerhood. NOTE: Multiple attendants  from different airlines did NOT let me wear Nora in flight. Not sure why, but seems to be the consensus.

Arrive Early
You’re GOING to take longer to get through the airport than you do when you fly alone. You’ll definitely have extra items, and it’s possible you’ll have at least one unexpected setback (like the time I was flying alone with Nora and forgot BOTH our passports AND my bag was overweight. I was frantically throwing shoes away to make weight while on the phone trying to get my passports to the airport….and holding a baby. Not my best moment🤦🏻‍♀️). Give yourself extra time for a mishap.

Checking In
IMG_4982When you check your bags, ask the agent if there are any open seats on the plane. If so, request to be moved next to that open seat, so you can have the extra space…even if it’s the very last row. That extra space makes a BIG difference!

Gate Checking Car Seats & Strollers
Any airline we’ve flown allows you to check both car seats & strollers at the gate for free, instead of checking them right when you get to the airport. Does this mean lugging them through the airport on your own? YES. But it also means less hands on your seat, throwing around of your seat, and likelihood of your seat getting damaged. If your child is still in the carrier that clicks in the stroller, it’ll be a breeze to get through the airport anyway, and you might actually find it helpful. (see stroller vs carrier below)

Use a Travel Bag for your Car Seat 
That all being said, I hiiiiiiiighly recommend purchasing (or borrowing) a car seat bag if you’re going to check it. It’s not required, but the one time I didn’t use bag, her seat came back totally moist after the flight. Yuck. Yuck. Yuck. The bag will also protect any straps from getting snagged or pulled. If your child is already out of the carrier but needs the convertible to wherever you’re going, we like this bag because it has both wheels and a backpack option. (I know ours wasn’t that expensive; google a promo code before buying)
NOTE: airlines make it pretty clear they are not responsible for any damage to your seat. If you have a seat available on the other side of your flight so you don’t have to travel with one, that’s your best bet.

IMG_9080Plan on grabbing a beer🍻
High Five! You’re almost through security!
(I think this one is pretty self explanatory.)


Going through TSA Security
Don’t sweat this. You’re GOING to take longer getting yourself, baby, and all of baby’s stuff through. The people around you can wait. That being said, here’s what to expect. If you’re wearing baby, you’ll have to take off the carrier, put it through the machine, and hold baby through the scanner. If you have your stroller, take out baby, fold it up to slip through the machine (almost all models of strollers are made to fit), hold baby and walk through the scanner. If you’re traveling solo, ask a TSA agent to help move you along….there is ALWAYS an one standing around.

Traveling with a Breast Pump
Story time! I had THE SWEETEST OLD MAN agent give me this advice the very first time I flew. (Let me back up; don’t check this item. Count it as one of your carry ons.) My first time flying with Nora, I was alone. I got pulled aside to get the pump scanned separately (which happens a lot). He told me that whenever my pump gets pulled aside to be checked separately, ask the TSA agent to change their gloves AND the swab pad they use to swipe over the electronics. Who knows what both items have touched before your pump. Ever since then, no other agent has offered that advice, but EVERY single one has obliged to change both swab and gloves without even the slightest eye roll. I’ve never forgot this message.


IMG_7285


Walk it out at Airport
If your child is walking, don’t wait at the gate for your plane. Do laps in the area to keep them moving; they’ll already be stuck long enough on a plane. Some airports have indoor playgrounds, so take a peek at the map to see if there is one near your gate.


“Preboarding”
If this is your first flight with baby, go ahead and preboard during the designated time for infants & toddlers. Getting settled (including your nerves!) is very satisfying.
If you’ve flown before with your kids and know the drill, I recommend being the last people on the plane…assuming you don’t need overhead space (something we stopped using a while ago). You will already be stuck in that seat long enough, I decided that sitting there the extra 30-40 minutes while everyone else boards was just too much.

Clorox/Lysol Wipes
As soon as you find your seat, wipe down the tray table, seat back, headrest, window, everything else as soon as you sit down. I don’t think it’s being germophobic at all…especially with the way the flu is flying around this year. Your kid is going to touch ALL of those things during your flight, and probably put their mouth on some. Don’t be shy about cleaning them up first.

IMPORTANT!
Planes have way more background noise than you think, Mama. Yes, you’re going to hear your own baby fuss because they’re right there, but there is SO MUCH interior noise… chances are your little one isn’t nearly as loud to those around you as you think. I promise.

And lastly, have fun on your adventure!
Plan ahead to ease stress, but don’t get caught up in what bystanders think of your parenting. You’re doing G R E A T.

blog sign

PS: If you have extra tips to offer readers, please comment below to add your insight!


a Mama’s #TransformationTuesday

Daaaang. Those cheeks!
(Where are my eyes?!☺️)

10 years

⬅️on the left
Almost 20
Gym time: 2-3x/week
Nutrition: beer & pasta
Sophomore in college
Having a fun day with my niece🤗

➡️on the right
A few weeks shy of 30
Home workouts: 4-6x/week
Nutrition: delicious & healthy
Has had 1 baby & currently 4+ months pregnant
Having a fun day with my daughter🤗

MOMS- It’s a freaking blatant LIE that you have to “let yourself go” after you have kids or believe that “my best body was from my early 20’s” or other things your great aunt & elderly neighbor have (in love) told you.

^^^It tugs at my heart whenever I hear that…not because it doesn’t happen, but when moms have heard it so much they believe it to be truth😔

I hope I can show you otherwise.

Let me be crystal clear.
There’s probably not a whole lot I would change about my college years. I enjoyed that time in my life.

Let me be crystal clear.
Solely getting in shape isn’t going to make you happy. Said it, meant it. But leading a healthy lifestyle & fueling your body correctly WILL help your body operate at an optimum state…and spill over other parts of your life.

Let me be crystal clear.
I believe so strongly in self love, no matter what you look like. I’m happy in BOTH these photos. In each one, I’m having a good day with my favorite little people💕 But today, I feel so much more confident in myself and my ability to leave an impact on other people’s’ lives. Of course I will attribute some of that to growing up over the course of a decade, but if I’m being honest I’m also really proud of the work I’ve put in to living a healthy lifestyle for my family.

Ready to start writing your own story?
Early Bird Enrollment is open for my February Online Health Group 💪

➕I’ll help you pick a workout program that fits YOU.
➕It’ll come with a food guide to be sure you’re FUELING up correctly.
➕Daily group check-ins (totally OFF regular social media platforms) & me as your coach

Headband freebie to anyone who commits by the time January is up!
Email me for details & questions, or get started on your own here!


7 Things to Keep in Mind when Visiting a Newborn

New babies can be an exciting time for both Mama & friends! Here are a few things to keep in mind when visiting your friend and her newborn.

(1) Go visit, love, then leave.
Don’t overstay your welcome. Between lack of sleep and the time it takes to feed (anywhere between 8-12 hours/day in the beginning; basically a full time job) mom & dad are short on time. While they’re excited to see you & show off their new babe, it’s likely they don’t have the same amount of time for you as they have in the past. Love on their new baby, then leave.

(2) If you’re going to bring a gift…
…my friends and I have a rule that says, “Friends don’t buy friends snaps” Stick with the zipper option when buying jammies. Snaps get to be a lot, especially in the middle of the night
Consider bringing clothes that are 6+ months in size; it’s likely the newborn size is already covered between the baby showers and other visiting friends. If you’re going to do this, think ahead about the seasons (ex: A baby born in July will not need a size 6 month summer dress because it will be winter when that baby is 6 months old).
don’t forget Mama! A bag of coffee or a few new K-Cups go a long way.

(3) Offer to help around the house
While you’re there, ask if you can load the dishwasher, switch over the laundry, or take out the trash. First time parents will probably refuse, but you can gently ask a second time. This doesn’t need to consume your entire visit (remember – it’s going to be short!), but something small like this is very helpful and will go a long way.
(New moms: if you’re reading this, just say “YES!”)

(4) Bring (healthy!) food
This might be best to set up ahead of time, but ask if you can bring a prepped meal or some sort of dish/side/snack so they can grab when short on time. (These banana bites and this quinoa side are awesome options!). I say “healthy” mostly because they probably have enough other sweet treats from others.

(5) Offer support…which doesn’t necessarily mean advice
It’s true new parents are overwhelmed and you’ll often hear them say something like, “I have no idea what I’m doing!” but this is not necessarily a window for you to offer your unsolicited advice. Remember that every parent & baby are different, and just because they’re doing something than what worked for you & your baby, doesn’t mean it’s wrong. If they ask for advice or mention something they’re struggling with, then share your experience….but beyond that simply offer support & encouragement.

(6) Don’t forget the big kids! 
If the baby has older siblings, be sure to take a little time to play with them, too. Mom & Dad will really appreciate it.

(7) Remember, this visit is about them (not you!)
While nuzzling a newborn will probably bring back so many fond memories of your own baby, but keep this visit about THEM. Complement THEIR baby, ask questions about THEIR birth, tell them THEY’RE doing a great job.
There’s no better way to make them feel special, and talking about yourself & your experience takes away from that. (For example, when they tell you their baby was 7lbs 8oz at birth, immediately responding with “Oh, [your baby’s name] was only 6lbs 5oz when born” takes away from their experience. Instead, try something like, “Aw that’s perfect! I love when they’re this little!”).  Pocket all your thoughts about your own newborn life for now, there will be time to have a more mutual conversation down the road.

Enjoy your newborn visit! I know mom & dad are excited you took the time to come over…they’re excited for you to meet their new babe!

I CAN DO HARD THINGS.

“I CAN DO HARD THINGS.”

This phrase means FAR more to me than the photo shows. It has defined parenthood for me up until this point. (You know- since I’m suddenly a professional parent now that I’ve been doing it for a whole 5 months😉)

…the pregnancy.
I CAN DO HARD THINGS.
This phrase cheered me through a lonely pregnancy while my husband was deployed.
This phrase uplifted me through that extra week & one day that sweet girl went over her due date.

…the delivery.
I CAN DO HARD THINGS.
This phrase motivated me through (30 hours of unmedicated) labor.
This phrase supported me through that TERRIBLE walk in the park (when I was already 5cm).
This phrase was repeated over & over & over & over as my body went to war.

…the first week.
I CAN DO HARD THINGS.
This phrase helped me through that disheartening first week when I wanted to give my baby back.
This phrase guided me through those physically painful moments as I learned to feed my baby.
This phrase encouraged me during the mentally draining hours it took to teach my baby to eat.
This phrase soothed me when I was genuinely upset at how a tiny human’s life is 100% dependent on my BROKEN body.

…the first few months.
I CAN DO HARD THINGS.
This phrase soothed me while I tried to calm a screaming infant.
This phrase got me through the times I was awake every other hour through with a sick little girl.
This phrase uplifted me when I knew I didn’t have a clue what I was doing.

…the postpartum workouts.
I CAN DO HARD THINGS.
This phrase encouraged me during my first postpartum workout at 9 weeks.
This phrase motivates me to “push play” on days I’d rather not.
This phrase helped me through every. single. rep. during yesterday’s workout.
This phrase reminds me to push continue making progress.

.
YOU CAN DO HARD THINGS.
Yes, you. I know you can.

Sometimes all it takes is a tweak in the way I phrase the activity in my head. Changing “This is really hard” to “I can do hard things” makes all the difference. Give it a try-I promise you NEED to hear yourself say it.

Parenting & taking care of yourself is hard…but YOU CAN DO HARD THINGS. 

hard-things

blog sign

Last Minute Halloween Costume: Scuba Diver Step-by-Step

Need a simple, last  minute Halloween Costume for your toddler?

Before I was even pregnant, I saw a photo of little trick-or-treat divers on Pinterest. The kids in the photo were much older than my daughter is now, but I had this realization this MIGHT be the last year we get to pick her costume!

{PLUS, She still uses a pacifier to sleep so I couldn’t resist the “pacifier regulator” …it’s my favorite part of the whole costume!}

nora-diver

It’s simple.
It’s inexpensive.
It’s clever.

In full disclosure, these directions LOOK long, but that’s only because they’re thorough. Anyone can put this costume together.

Go ahead and make your own!

WHAT YOU NEED

The Wetsuit: Solid black clothes. You can find these anywhere!
..and she’ll wear them again.

The BCD (vest): (optional) Puffy vest of choice; Old Navy (comes in many colors; bonus…it was 1/2 off)
She’ll also wear this again.

The regulator (mouth piece)*: pacifier, black pipe cleaner, black porous soaker hose tubing
*you can get creative here and really use any sort of black tubing; pipe cleaner and the porous tubing were just what I found  first

The tank: empty two liter  bottle, sand paper, silver spray paint, black electrical tape, some sort of black chord- I used bungee cord, black craft paint

The Fins: Craft Foam Sheet (I grabbed the thickest I could find), sharpie

The mask: kids goggles (my daughter wore them like a headband instead of on her face)

DIRECTIONS

img_5078
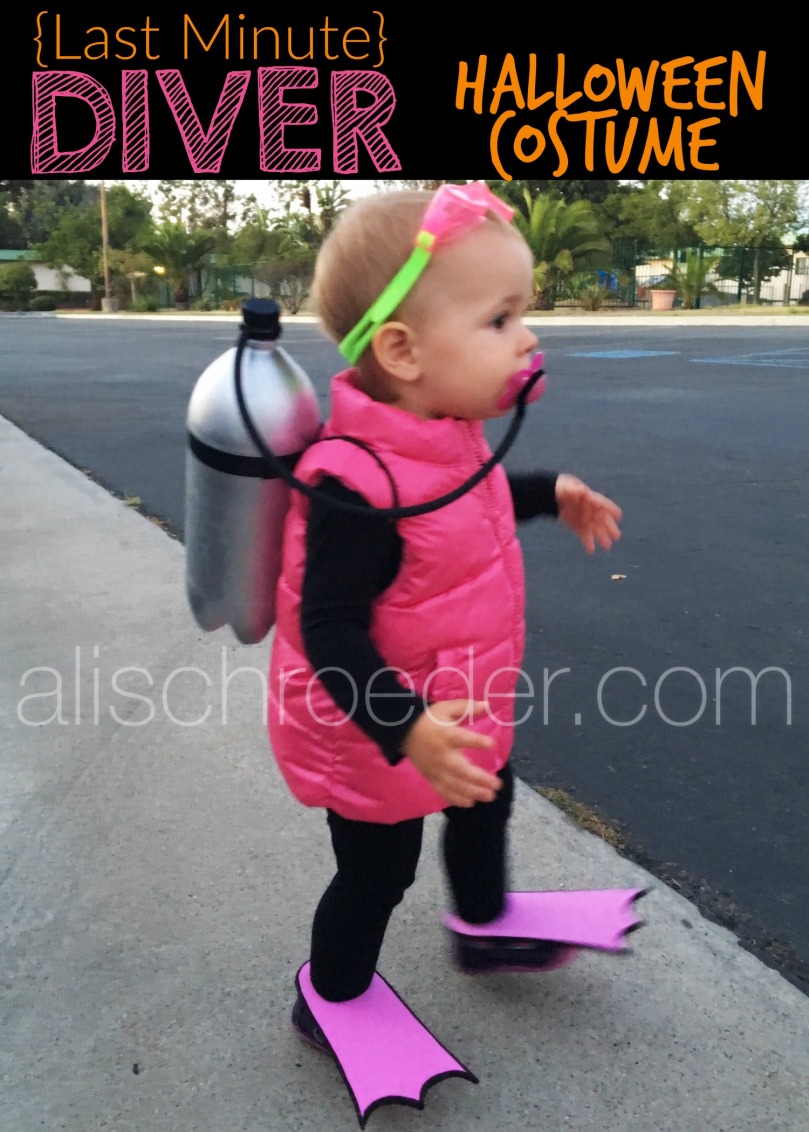
The Wetsuit: grab black clothes! done.

img_5079The BCD (vest): snag the puffy vest! done.

The regulator (mouth piece):
1) Wrap one piece of pipe cleaner tightly around the knob of the pacifier. Tightly twist the two “tails” together all the way to the end, making one “tail”
2) Measure out the porous hose tubing loosely from the middle of your toddlers shoulder blades to their mouth; cut.
3) Insert the tightly woven pipe cleaner (from pacifier) into the porous tubing. It will be a snug fit

The tank: 
1) Empty a 2 liter bottle; I chose a cheap brand with the traditional round look
2) Peel off the label and lightly sand the entire bottle
3) Spray paint the tank silver, let dry
4) Paint cap with with black craft paint, let dry
5) Wrap single piece of black electrical tape around bottle about 1/4 from top. This will line up in the middle of their shoulder blades. When looking for the best placement of tape, be sure they won’t bonk their head on cap of bottle
To attach to regulator: 
1) Twist black pipe cleaner around mouth of bottle (just like you did with the pacifier)
2) Insert the tightly woven pipe cleaner into the porous tubing. It will be a snug fit
To attach to child: 
1) Put vest on child
2) With one single piece of bungee cord, make a figure 8 going around both arms and criss-crossing between their shoulder blades…much like a backpack
3) Cut bungee at that size & knot
4) Using electrical tape, tape the criss crossed X bungee cord to the black electrical tape stripe on the tank

fullsizerender-13
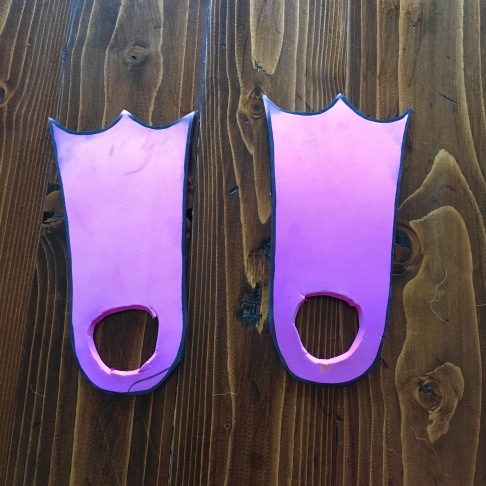
Fins (these will slip over ankle & sit on top of their shoes)
1) Find a template of flippers online and print or trace, OR freehand draw a fin on the craft foam. Be sure width of fin is slightly wider than the width of your child’s shoes. Longer is okay
2) Cut it out
3) Trace the existing fin on the craft foam, then cut out second fin
4) Cut small hold toward heel of fins so child is able to slip foot through. Be careful not to cut too closely to the edge so it doesn’t rip
5)Trace edges with black sharpie

fullsizerender-14

There you have it! Last minute, creative, simple halloween costume…

If you end up making this for your child, post your photos below!

blog sign

The Best Basic Day

[originally written July 8, 2016]

I have a dear friend that sits in her closet with a cup of coffee (but I bet sometimes it’s wine) when she needs a sec.

13626491_10103479607151438_4636610858089396313_n

I can’t fit in my closet, but the corner of my bedroom floor is working very well tonight. Yes, that’s a glass of wine.

Today was basic. 
Almost as basic as it could ever get, yet somehow one of the best days I’ve had in a while.

My daughter is becoming my most favorite human. It really wasn’t overnight, but all in one day she learned how to give kisses, blow raspberries (hilarious!), knows what you’re referring to when you ask her to find the puppy or baby (her toys), was fascinated with the ball pit for her birthday party, and is taking 3-4 steps on her own.

She is such a neat tiny little human.

I didn’t get nearly enough work done, but what I did do was structured and organized.
I’m very happy with that…I wish I could say that was normal.
I’m sure it’s no coincidence I had the best workout in a while.

I took the dog for a walk in a new neighborhood; I do that sometimes. Our same old block gets boring for both of us, sometimes driving a short mile in any direction first is just what we need. It might be one of the best walks we’ve had together—I don’t think she realizes how much I cherish those times, too.

My house is a mess. Not even just a mess, but actually dirty. Somehow, though, it still seems like a comfy home…even as I sit in the corner of my room.

You see.
Super basic.
The me five years ago never would have claimed this to be one of the best days. Yet somehow today was just that.

Beyond blessed to be in a place in my life that is filled with so much love & happiness…no matter how ordinary. I like this life we’re building.

Alright- picking myself up off the floor to go spend the remainder of the evening with the best man I know❤️

Thanks for being my listening eyes & ears. I hope you’re in a happy place, too, no matter how ordinary. If you’re not, I hope this chaotic moment you’re going through right now makes you appreciate that place of basic contentment when the time comes.

Cheers🍷

WEEK ONE RECAP: “Having a Martha Home the Mary Way” by Sarah Mae

It might not have been until 10:00pm on Day 7, but I am still on track after one week!
WEEK ONE RECAP of my experience reading Having a Martha Home the Mary Way by Sarah Mae.
 IMG_2120
If it was just completing the reading/studying/MARY portion of this book, I’d probably already be done. It’s how I roll…I love to read and absorb knowledge, often at a pretty quick pace.
It’s that execution/follow through/MARTHA portion that always has me stumbling…and this pretty much rolls over into every area of my life!
{Amazing how different aspects of life roll over to each other. Nonetheless, I’m on track!}

Here’s how the study works:
Each day there is a short 3-4 page reading on a life lesson. Maybe it’s about personality, or the author’s story with an applicable theme.

These quick pages are followed by the “Mary” portion of this study. Typically there is just 1-2 verses to reference followed by a short 2-3 reflection points. Sometimes these points encourage you to reflect on yourself along with the bible reference, other times it’s a place to make a list or schedule for the day.

Finally, the “Martha” tasks come. And now that you feel rejuvenated from reading & reflecting…you’re ready to tackle your house! Each task has a step-by-step process laid out in very BASIC bullet points.

I’ve learned a few things about myself in this first week of this book. The BIGGEST lesson I’ve learned is that I can be just as effective (if not more effective!) by doing smaller things all the time.

Generally speaking, I tend to be somewhat of an extremist; both my husband & I are this way. Either we’re not getting off the coach OR the entire house gets renovated in one day flat – haha. In terms of housework, this typically means the entire house is spotless and everything is crossed off the list OR everything is disheveled.

Clearly I need a little “smaller tasks all the time” mentality. {enter this study!}

This week, I’ve followed the execution portion step-by-step (even when instructed a different way than I’m used to…no matter how basic!) and guess what?! IT’S WORKING.

The one change I did make from the beginning of the week is how & where I study the Mary portion of this book. In the beginning, I’d grab my coffee, settle in on the couch, get cozy and open my book. My coffee would barely be at a drinkable temperature before the chapter was over (because they’re short!), but I wasn’t done with my own “relax” time. You can see where this is going. I wasn’t ready to get up and move on to Martha section, which completely defeated the purpose of this study!

Now, I actually just open the book and my bible while standing at the kitchen counter. This makes it much easier to hop to it!

Excited to see what week 2 brings!
blog sign

Believe in your SELFie

I’m DEFINITELY “pro-selfie”…here’s why!

Untitled (3)

{I’ve been there…the “why does she post photos of herself?!” mentality}

Here’s the thing, though:
It could be MUCH, MUCH worse. Instead…
●She might have terrible self-image.
●She might not think she’s pretty “enough” (whatever that means).
●She might have this unrealistic expectation of herself.
●She might feel she can’t live up to YOUR standards.
…and all of that is far worse than posting a photo of herself. 

Does it matter WHO took the photo?

Now…I know PLENTY of CONFIDENT women who choose to share pictures of their dogs & kids & adventures instead of themselves…I’m not talking about them. I’m talking about the women who think about posting a photo of themselves, but ultimately DON’T do this because they feel judged.

It’s YOUR profile. People come to see YOU.

#loveyourSELFie #empowereachother #nojudgement #positivity

I dare you to step outside your comfort zone & post a selfie today!

{…and give a second thought to clicking that “like” button next time “she” posts a selfie. She might just be needing it 💜 }

Top 4 Postpartum Products

top 4 cover

Having a baby, especially for the first time, is like walking into a whole new world you didn’t even know existed – ESPECIALLY when it comes to products! Where do you even start?

Here you go…my top 4 most useful postpartum products for Mama.

NUMBER FOUR: Beband!
found at: Target (maternity section)beband

This is technically marketed as a maternity item during pregnancy. The idea is you still get to wear your regular jeans, but don’t need to button or zip them. I used it for this a little while, but actually found it much more useful postpartum.

I found nursing tanks on top of nursing bras (especially in August) got bulky, clippy, and hot. When completely unfolded, the beband easily covers from your waits to your bra.

The REAL BONUS, though, was that it almost worked as a corset (if you really need one, they make those, too). Nobody told me how JUMBLED my core would feel. It felt like jello; most days I had to guide my hand on the wall as I walked down the hallway because my trunk was so weak. The beband worked as almost an “ace bandage” to help hold everything secure.

I ended up buying a second one in another color and wore them for about the first 6 months!


NUMBER THREE: Honest Company Nipple Balm
found at: Target, Honest.com

71IVvCp9r2L._SX522_

Days 4 & 5 of my daughter’s life were the HARDEST of my life. I would actually go through that 30 hour labor all over again instead of those 2 days. I mean that. Everything is so mentally draining and physically painful. {It probably didn’t help my entire team of leaders was relaxing in a beach house at a retreat in Myrtle Beach at this exact moment AND I was stressing that my husband was going to leave to finish out his deployment in 4 days!} Getting through those days is SO worth it, though. SO WORTH IT. I learned to feed my baby and she learned to eat. Eight months later we’re still going strong.

…but I digress. Breastfeeding Mamas…get this nipple balm.

I tried FOUR different nipple balms.
Don’t do that.
Just try this one first.
There is nothing like it.


NUMBER TWO: Epsom Salt
found at: any drug store or pharmacy section14899720

Epsom Salt baths can help speed up recovery.

My midwife told me to take an epsom salt bath 4x/day. um. what? No new mom has time for that. At least….I didn’t MAKE time for it. I did, however, have at least one every. single.day for about 7 weeks. Sometimes I had more. This bath actually became a good spot to nurse my baby.

Epsom Bath Directions: Simply fill the bath with about 4-6 inches of water and 1 cup epsom salt


THE NUMBER ONE best product: Witch Hazel
found at: any drug store or pharmacy section
11454823

What is this? I still don’t know. Magic witch craft I suppose?
Basically, it’s used to help heal skin abrasions. Just go buy a whole boat load of it!

I used this for TWO main things per the direction of my midwife.
1) your peri bottle will be about 8oz; fill it with 1 oz witch hazel and the other 7 water EVERY. SINGLE. TIME.
2) I used it to make postpartum healing pads. Follow these directions to make your own.


There you have it! My top 4 favorite products to have on hand right after baby. Better go stock up before baby arrives!

blog sign