
While choosing themes for the bedrooms, we decided that perhaps a nautical theme for our own room might be a little cliche. We did, however, decde this would be an incredibly appropriate theme for our guest room for our visitors who are coming to stay just a mile and a half from the sea. Right?!
I found these curtain rods at Pottery Barn, but wasn’t about to pay $90.00 for them….so naturally to etsy I went. I LOVE etsy…for two reasons.
1) Yay small businesses! You have my support any day.
2) Most of the time it inspires me to get crafty myself.
Much to my dismay, the price of this curtain rod on etsy was even higher than Pottery Barn! WHAT?! Aw man….$142.00.

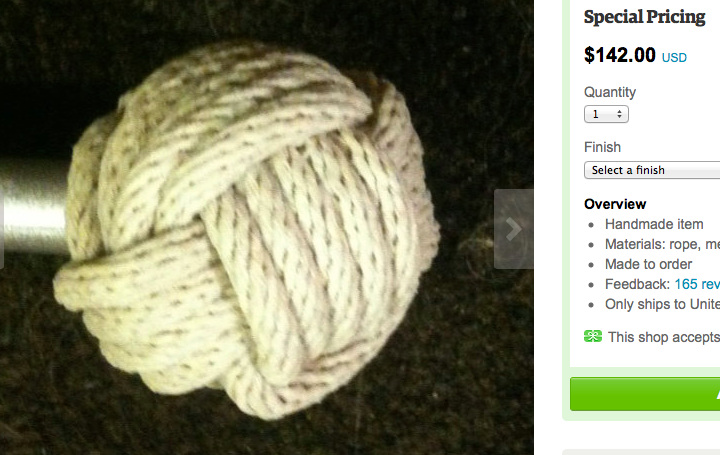
Decision made. I’m doing this on my own.
I trotted off to Michaels and bought 15′ of rope for $5.99….which is probably way more expensive than if I just had my husband go to a marina and buy it in bulk; oh well. Here’s the brand I bought; I ended up using about 1/2 the roll for one side:

Luckily, the old homeowners left these pretty ugly curtain rods for us. Since I was covering up the ball on the end (and gold is totally fine in a nautical room) I spent a whole $0.00 on the rod. Feel free to shop for these on your own at a Ross/TJMaxx/Marshalls/Home Goods kinda store…it doesn’t really matter what they look like since you’ll be covering up the ends, anyway.
These two supplies (plus a knife to cut the rope) are all you need!

The first thing you need to do is teach yourself to tie a Monkey Fist. I’d recommend going to youtube and just watching a quick 4 minute video on how to do so. For those who are too anxious and just want to keep going, here are the instructions and process as I tied my knot:
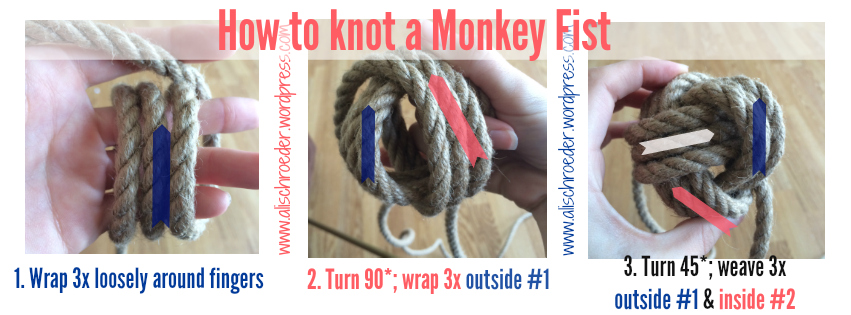
1. wrap 3x loosely around fingers
2. turn 90*; wrap 3x outside #1
3. Turn 45*; wrap 3x outside #1 & inside #2
*Note: You can choose to wrap 4 or 5 times (instead of 3) as the Pottery Barn & etsy rods show above.
Be sure to leave the knot to be plenty loose as the curtain rod still needs to fit inside.
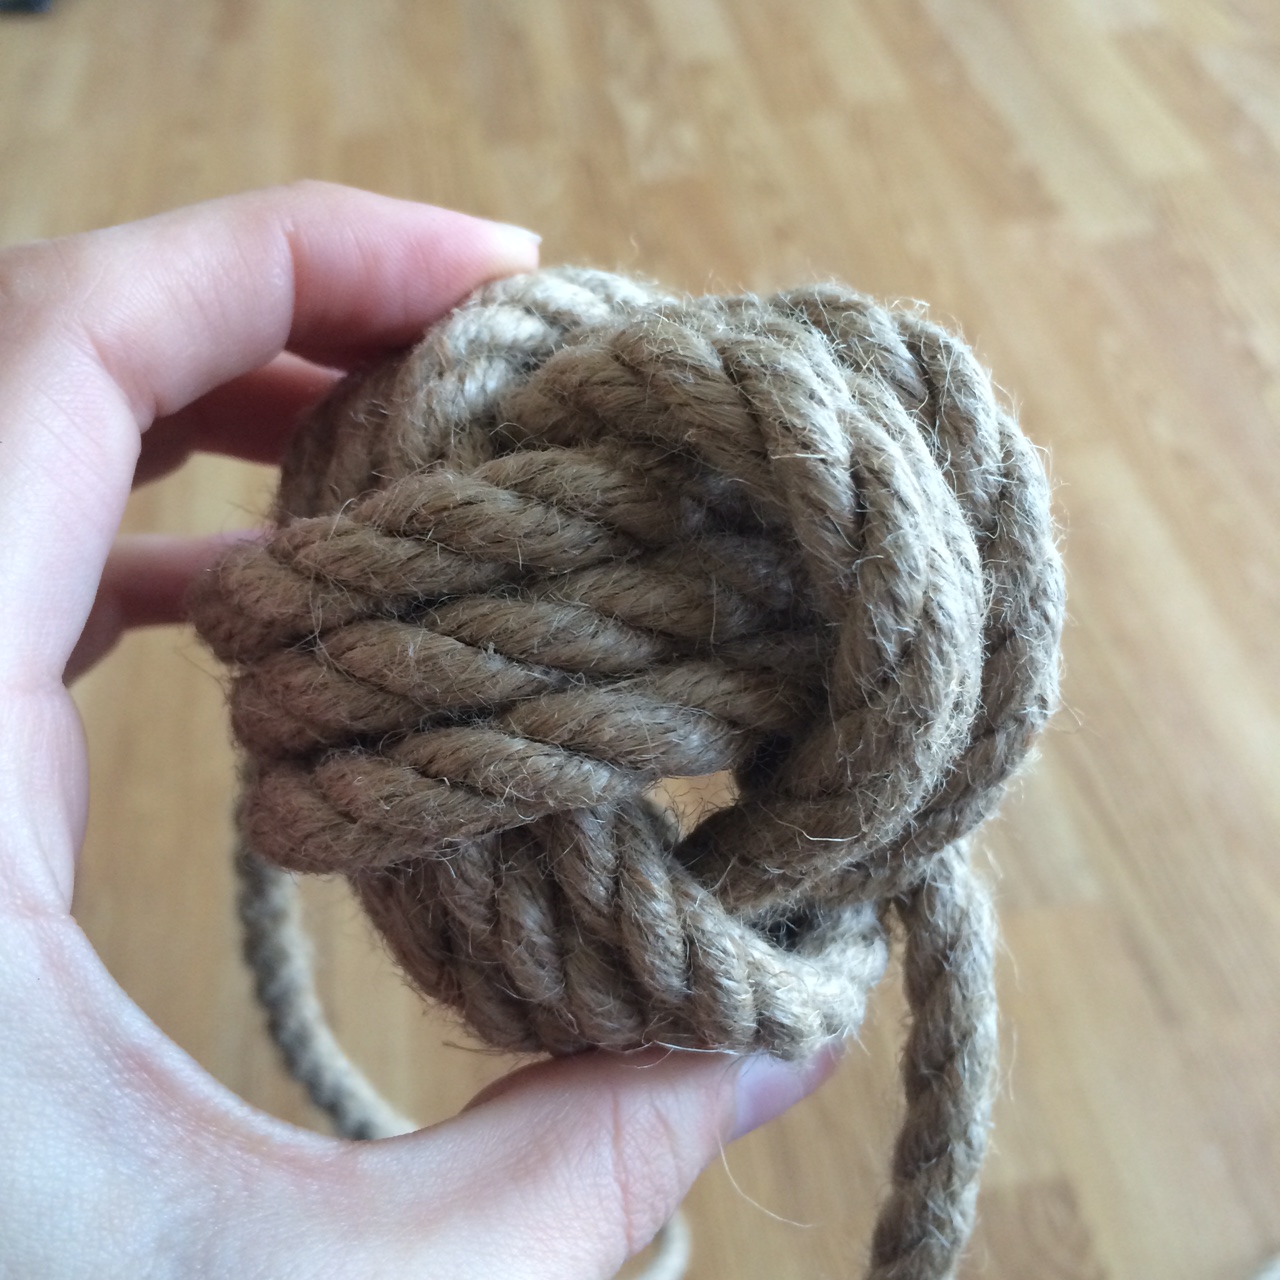
Pick a loose spot for the rod, and carefully wedge the ball in there. Keep in mind you can always rotate the knob so the perfect side faces the outside of the room.

Begin to tighten knot. Once you’re close to being finished, pull the edge of the top underneath the nearest “underpass” …simply cut and tuck inside.
Add your curtain, and hang! The finished product isn’t so bad (especially when you consider the money saved)! TADA!


Have fun and keep me posted on your own projects!


This is great! Did you leave the original end on and just cover it with the rope ball?
LikeLike
Hi, Diane! I left the original end on because the ball of the rod was small enough and figured this would be the easiest way to attach it to the rod. If the rod you’re having has a large knob, though, I’m sure you wouldn’t need to keep it on 🙂
LikeLike